- 1 Introduction
- 2 Install Anaconda
- 3 Anaconda Navigator
- 4 Anaconda Powershell Prompt
- 5 Starting a Jupyter Notebook
- 6 Conclusion
1 Introduction
If you want to work with Python you need a suitable IDE.
IDE stands for “Integrated Development Environment” and there are many different ones you can use for Python:
to name just a few.
I personally prefer to use Jupyter Notebooks. For this we need Anaconda. Anaconda is a free and open source distribution of the programming languages Python and R for scientific computing (among others: data science, machine learning).
Using Anaconda in conjunction with Jupyter Notebooks offers two distinct advantages:
- Using Jupyter Notebooks, you can create and share documents that include live code, equations, visualizations, and narrative text.
- Using Anaconda, you can easily and quickly create virtual environments, extend them as desired and share them with other colleagues or clients.
In this post I want to show how to get Anaconda and Jupyter Notebooks running.
2 Install Anaconda
First of all we have to install Anaconda. You can do this from here: Anaconda Installation.
Here you can select for which operating system you want to have Anaconda installed. For Windows for example follow this link: Anaconda Installation for Windows.
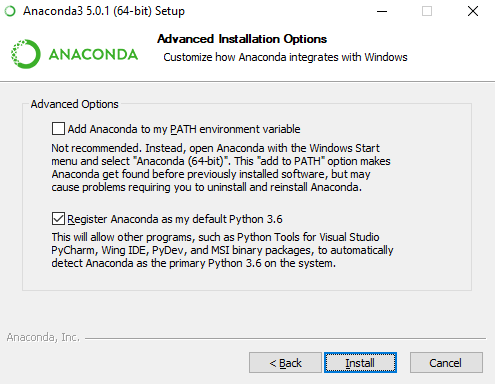
After the .exe file has been downloaded, run it and click through the installation. There is only one step to pay attention to here. When you get to the Advanced Options section, select ‘Register Anaconda3 as my default Python 3.8’.
In any case, you should make sure that the path to the future environments is stored in your environment variables.
This should look something like this:
C:\Users\Anaconda3\envs
3 Anaconda Navigator
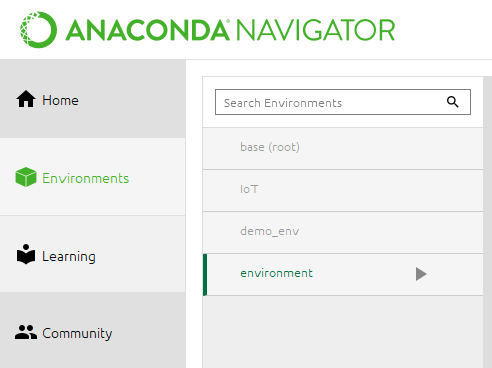
After successful installation, search for Anaconda Navigator on your computer.
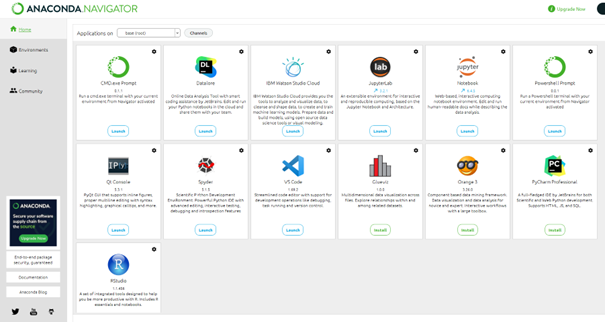
As we can see, different IDEs have already been installed with it, including Jupyter Notebooks. On the left side we can now select Environments.
3.1 What are environments?
To program with Python we need different libraries (for example numpy or pandas). We can store these collected in virtual environments. It is of great advantage that you can also use specific versions of the libraries.
To program with Python we need different libraries (for example numpy or pandas). We can store these collected in virtual environments. It is of great advantage that you can also use specific versions of the libraries. Why is this important, especially in project work, when you have developed models or done analyses for customers? You have the option of extracting all the libraries used for this purpose with their respective version and handing them over to the customer. In this way, the customer is able to execute the code without errors for a long time. It often happens that parts of packages change and then no longer work. That’s why version management is so incredibly beneficial.
3.2 Create a new Environment
We have now selected Environments on the left side.
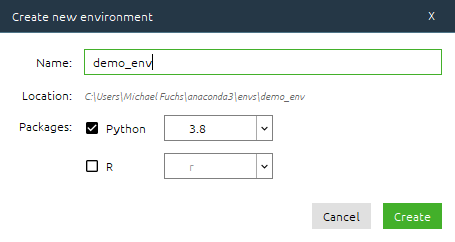
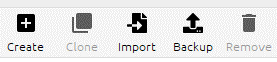
At the bottom there is a button ‘Create’ with which you can create a new environment.
Give it a desired name and select the Python or R programming language.
Click on your new environment and select ‘Not installed’ at the top.
Now you can search for new libraries that you have not yet installed in the respective environment. Here for example Pandas.
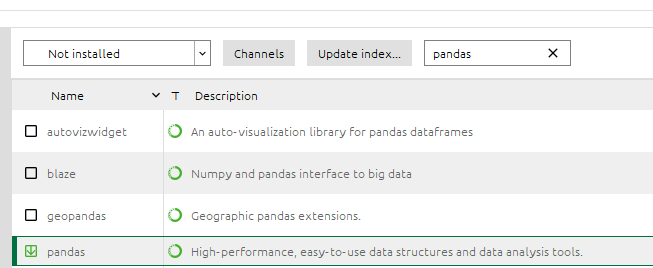
At the bottom you can press ‘apply’ to perform the installation. Often it happens that with large libraries like pandas is one, further packages are installed with it.
3.3 Import Environments
We do not need to load each library individually. Predefined environments with a list of libraries can also be imported at once. I have created a test environment here: environment.yml
Let’s use the Anaconda navigator and go to the environments via the corresponding button on the left.
At the bottom there is a button called ‘Import’. With it we can import the new environment together with its predefined libraries.
4 Anaconda Powershell Prompt
With Anaconda, the Anaconda Powershell Prompt was also downloaded. I actually manage my environment exclusively via the Anaconda Powershell Prompt. The reason for this is that I can’t do everything via the Anaconda Navigator. For example, I can’t find all libraries via the search function such as the very popular jupyter_contrib_nbextensions. Another reason is that I cannot extract environments for sharing.
4.1 Exploring your Environments
With the following command we get an overview of the existing environments installed:
conda env list

Ok, so far we have only installed the base environment but to see which libraries with which version are installed in the base environment, use the following command:
conda list -n base

Alternatively, you can activate the desired environment and then display the installed libraries:
conda activate "your_env"
conda list
If you want to check which version of a particular library is installed (in the activated environment) you can also query that directly:
conda list pandas

Here we see that in the base environment pandas is installed with version 1.4.3.
If you want to see which Python version is installed use this command here:
python -V
4.2 Import Environments
We can also import predefined environments using the Anaconda Powershell prompt.
If you want to have the created sample environment feel free to download it from my GitHub Repository.
Navigate again with cd to the respective place where the .yml file is stored:
cd "path/to/root directory"
conda env create -f environment.yml
In our demo environment I installed the following basic libraries:
- python
- pandas
- numpy
- scikit-learn
- matplotlib
- seaborn
- nltk
- pip (from conda!)
- tensorflow (via pip)
- keras (via pip)
- xgboost (via pip)
- jupyter_contrib_nbextensions (via pip)
Please execute the following command to make the nbextensions work:
jupyter contrib nbextension install --user
Please do not forget to uncheck ‘disable configuration for nbextensions without explicit compatibility’ in Jupyter Notebook so you can use the nbextensions.
Of course, some cool libraries will be added over time. How to add them you will learn in a moment. And already we have a new environment installed:

You can also use the list command to see which library was installed with which package manager. See the entries ‘pypi’ or ‘anaconda’ in the column ‘Channel’.
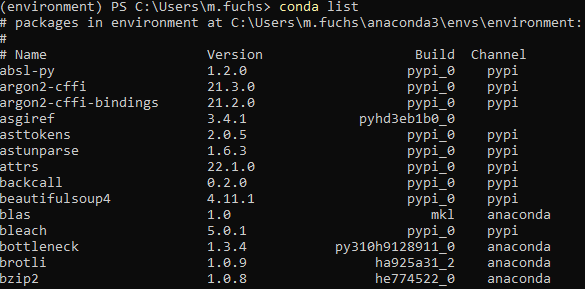
How this comes about I explain in the following chapter.
4.3 Adding Libraries
4.3.1 Pip vs Conda
Python supports third-party frameworks and libraries that already contain various features and elements that can be used by programmers.
Pip and Conda are both package managers that assist in the installation and management (update or removal) of packages.
Pip is the official package manager of the Python Software Foundation. It gets its packages from the official software repository PyPI (Python Package Index) and is delivered by default with the installation of Python.
In contrast, conda is a language-independent and cross-platform package manager that manages Python packages, among other things (C libraries or executables like C compilers). It is supplied by default with the installation of Anaconda.
Unfortunately, problems can occur if conda and pip are used together when creating an environment.
Most of these problems originate from the fact that conda has limited ability to control packages that it did not install itself.
If conda is run after pip, packages installed via pip can be overwritten. Likewise, a library installed by pip may inadvertently update or remove packages that are needed by other conda libraries and thus become unusable.
4.3.2 Best Practice
Conda is often used for data science and machine learning applications and is therefore the more interesting package manager for me. However, pip is the central package pool with far more available libraries than is the case in conda. Thus, sometimes it is simply unavoidable to use both pip and conda in the same environment at the same time, as some libraries are exclusively available to PyPI.
Therefore, there are some recommendations that should be followed:
- Use virtual environments for isolation
- Create a separate (virtual) environment for each project
- Install as many libraries as possible with conda
- If there is no way around pip, install the pip version of Anaconda (conda install -c anaconda pip) in your virtual environment first, so that the PyPI package is only installed in this environment and not across all environments
- Make sure that pip does not run in the “root” environment
- Make a backup copy of your environment so that you can fall back to the old state
4.3.3 Add Packages via conda & pip
For both options, make sure that you have activated the desired environment in which to install the new package. For the second one, make sure that the pip version of Anaconda is installed.
conda activate "your_env"
Conda:
conda install -c anaconda django
Pip:
We assume here that Theano is only available via PyPI (I know there is also an Anaconda version for this).
pip install Theano
4.4 Installing a specific Version
By default, the latest version of a library is installed or at least the latest allowed one (due to dependencies to other libraries).
However, you can also install specific versions of a package:
conda activate "your_env"
Conda:
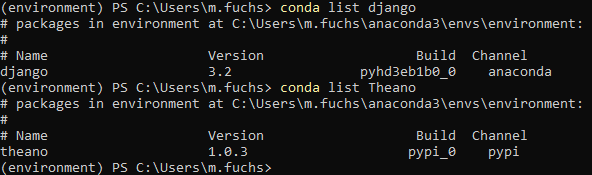
conda install -c anaconda django==3.2.0
Pip:
We assume here that Theano is only available via PyPI (I know there is also an Anaconda version for this).
pip install Theano==1.0.3
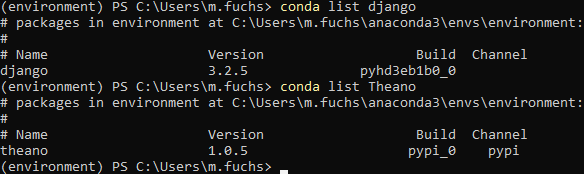
Let’s display the installed versions:
4.5 Updating Libraries
If you have been working with an environment for a while and suspect/know that there is already a newer version of a package, you can also update this library:
conda activate "your_env"
Conda:
conda update django
Pip:
We assume here that Theano is only available via PyPI (I know there is also an Anaconda version for this).
pip install Theano --upgrade
With these two commands, the latest or latest possible version is installed again.
Let’s display the installed versions again:
If you want to update your complete environment you can do it with this:
conda update -n "your_env" --all
4.6 Deleting Libraries
Deleting libraries is as easy as adding them.You just need to know if the package was installed via pip or conda and then use the appropriate command:
conda activate "your_env"
Conda:
conda remove django
Pip:
pip uninstall Theano
4.7 Exporting an existing Environment
Why I like working with virtual environments so much is shown by the fact that you can export existing environments very easily. Either because you want to make a backup or to share with colleagues so that everyone is working with the same libraries or versions of the packages. It’s not uncommon for developers to have problems just because they’ve been working with different versions of libraries.
Make sure that the environment you want to export is activated.
conda activate "your_env"
cd "path/to/destination"
conda env export --file exported.yml
The activated environment is now exported to the named destination and saved as a .yml file.
Here it is:


I always use Visual Studio Code to open this .yml file.
Please make two changes in the .yml file:
- Change the name (at the top) to be the same as the name of the .yml file.
- Delete the Prefix at the end of the file
4.8 Creating a new environment
As I mentioned before, it is advisable to create a separate environment for each new project. This can be done either by importing a .yml file with a base environment and adding all the necessary packages manually or by creating a completely new environment directly from Anaconda Powershell Prompt.
This is really very simple and fast, just use:
conda create -n myenv
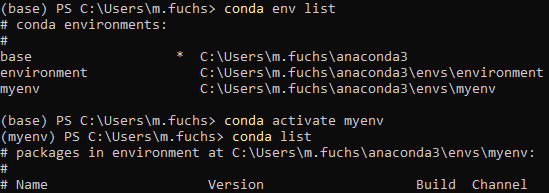
As I said, super easy but as we can see it is unfortunately still completely empty.
First of all I activate the new environment and install pip from anaconda as a package.
conda activate "your_env"
conda install -c anaconda pip
After that, all sorts of other libraries can be added without hesitation.
For example, here is a list of the packages I used to create the example environment (found here in my GitHub Repository):
conda install -c anaconda pipconda install -c anaconda jupyterconda install -c anaconda pandasconda install -c anaconda numpyconda install -c anaconda scikit-learnconda install -c conda-forge matplotlibconda install -c anaconda seabornconda install -c anaconda nltkpip install tensorflowpip install keraspip install xgboostpip install jupyter_contrib_nbextensions
You may need to run the following command once more to see the nbextensions later:
jupyter contrib nbextension install --user
Please do not forget to uncheck ‘disable configuration for nbextensions without explicit compatibility’ in Jupyter Notebook so you can use the nbextensions.
4.9 Deleting Environments
Quite apart from storage capacity reasons, I quite like to keep my workspace as clean as possible. This includes deleting environments that are no longer needed (after exporting them to a .yml file, of course).
This can be done with the following two steps:
conda deactivate "your_env"
conda env remove -n myenv
And again we have only two environments:

Now we have deleted the environment, but the file under Anaconda is most likely still there. Use this command to see where your environments are stored and then delete the folder (in our case this would have been ‘myenv’) so that everything is really clean again:
conda info --envs
5 Starting a Jupyter Notebook
This is a very simple process:
- Determine the path where the notebook should be opened
- Activate the environment you want to use
- Start the Jupyter Notebook
Here are the commands to do this:
cd "path/to/root directory"
conda activate "your_env"
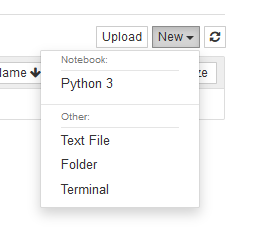
jupyter notebook
A new tab is generated in the specified default browser from which you can launch Jupyter Notebooks.
How exactly the Jupyter notebooks can be used is not central to this post. But you can find lots of beginners guides on the internet:
- Jupyter Notebook: An Introduction
- Jupyter Notebook Tutorial: The Definitive Guide
- Jupyter/IPython Notebook Quick Start Guide
From a Jupyter notebook it is also possible to check which packages are installed in the selected environment or which packages have been installed with which version. The location can also be determined:
!conda list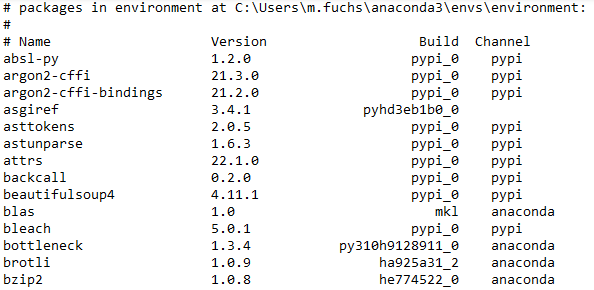
import pandas as pd
import keras

import os
print('Installed version for pandas: ' + str(pd.__version__))
print('Installed version for keras: ' + str(keras.__version__))
os.path.abspath(keras.__file__)
!python -V
6 Conclusion
Working with virtual environments is really fun. If you follow the advice given above, you will prevent a large number of the errors and conflicts that arise in practice.
Download the created Environment
If you want to have the created sample environment feel free to download it from my GitHub Repository.
Possibly the packages are no longer up to date. You should therefore update the most important libraries. Here is my list of commands, which I call in the Anaconda Powershell Prompt after I have activated the desired environment:
conda update pipconda update jupyterconda update pandasconda update numpyconda update scikit-learnconda update matplotlibyconda update seabornconda update nltkpip install tensorflow --upgradepip install keras --upgradepip install xgboost --upgrade